Steps to Install the process of PHP with apache server and Mysql server in ubuntu OS
So lets get start of discussion to how we can install PHP with Apache server and Mysql server in Ubuntu. In this Blog I'm gonna show step by step installation or instruction that how you can install PHP with Apache server and Mysql server in Ubuntu.
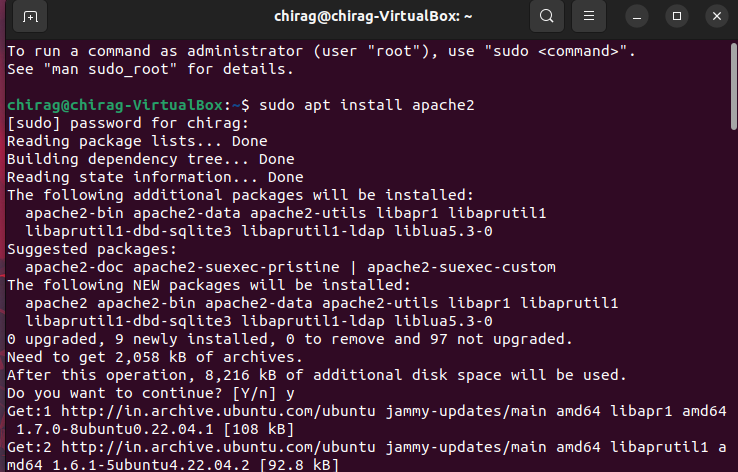
After some installation it will ask yes or no question you just write a yes and then further or remaining installation proceeds and then its start downloading files in machine
To check index file the location is /files/other location/computer/var/www/html
3. Install PHP :
Now to install PHP in your ubuntu system you have to write the following command as
chirag@chirag-Virtualbox : $ sudo apt install libapache2-nod-php -y
After that you just have to restart the apache server so we have to write the command given below :
chirag@chirag-Virtualbox : $ sudo systemctl restart apache2
4. Test PHP :
Now to test that we have successfully installed php on your machine or not you have to enter a command in your terminal
chirag@chirag-Virtualbox : $ sudo gnome-text-editor /var/www/html/phpinfo.php
And after pressing enter it will open a gnome text editor in your machine as given below :
Now open your browser and see what this file shows so to view a PHP file on ubuntu machine you have to write in browser a command given a
localhost/phpinfo.php
And then it shows information about your php
5. Install Mysql server :
Now again open your terminal and write a command to install mysql server
chirag@chirag-Virtualbox : $ sudo apt install mysql server
This command will install mysql server in your machine
6. Install Mysql Client :
To install mysql client in your machine you have write following command to your terminal as :
chirag@chirag-Virtualbox : $ sudo apt install mysql client
Now the remaining procedure needs to complete like to setup the php and check the version of the php
After downloading of Mysql clients files open a new tab in terminal and write the following command as
chirag@chirag-Virtualbox : $ sudo apt install php8.1-mysql
Now same as above command write another command in terminal as
chirag@chirag-Virtualbox : $ sudo apt install php8.1-curl
After the completion pocess of the above command now check the version of php in your ubuntu machine
the command is chirag@chirag-Virtualbox : $ php -v
The above version is the php latest version so you cross check with your setup
Now setup is almost complete so you just need a restart to your mysql by following commands as :
chirag@chirag-Virtualbox : $ sudo systemctl status mysql
The above command gives all the status related to your mysql as task storage and memory etc you can check
So now you are finally installed php with apache server in your ubuntu machine successfully . The installation is complete but we don't know how to use php or create file in ubuntu so for that we need to perform a demo practical where we gonna create a file and write a program in php script.
7. Performing PHP program :
To create a simple PHP program first we need to create a php file for that and you need open a terminal from the /var/www/html location
Right click on mouse and open a terminal and then write a command to create a file and command is
chirag@chirag-Virtualbox : $ sudo touch file1.php
you can name file as of your choice
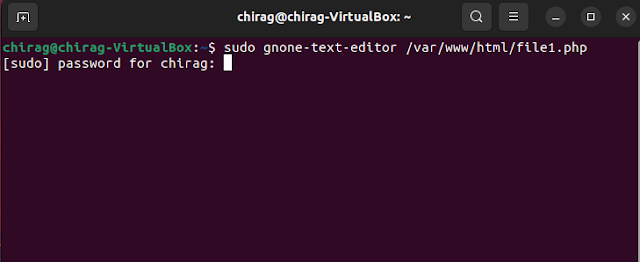
File is created now you have to open gnome text editor to write the program so for that the command used is
chirag@chirag-Virtualbox : $ sudo gnome-text-editor /var/www/html/file1.php
this will open the editor in that created file
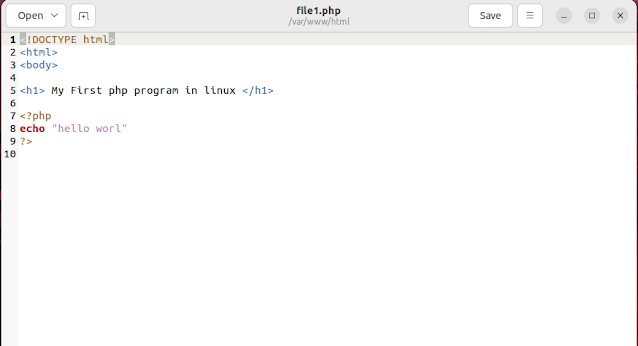
Inside the text editor you need to write the program you want let us create a simple program given below
After the program is wirtten then you just need to save the program and then to view the php program you need to open your favourite browser and search localhost/file1.php and press enter
It will show the program which you are create
So we are fully completely with installation of PHP with apache server in ubuntu machine and also run a sample program in ubuntu so according to following steps you can also run PHP in apache server in ubuntu machine


.png)


.png)
.png)


Comments
Post a Comment